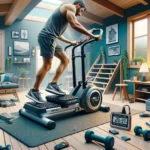
Setting Up A Home Gym
Maybe you’ve thought of setting up a home gym before. You’d be able to have your workouts on tap, not having to step out the door on cold mornings or fight through traffic to get your workout in.
But then you’ve foreseen the challenges and resigned the idea to the ‘too hard’ basket.
While its true that the very idea of setting up a home gym can seem overwhelming, the reality is that the task is well within the reach of most people.
In this article we will dispel the myth that setting up your home gym is a task too far. In fact, we’ll lay out a step by step plan that will allow anybody with at least a 15 foot by 15 foot space to create a training area that targets every area of the body and utilizes the same exercises that you’ll find at a commercial gym.
And we’ll show you how to do it without pumping up your credit card debt.
Step 1: The Foundation: Flooring
In this article, we’re going to make a couple of assumptions:
- You have a dedicated area available that provides you with at least 15 square feet of space.
- You either own that space or have the freedom to permanently affix equipment to walls, ceilings and floors.
Ok, great – so, the first thing you’ll want to do once you’ve zeroed in on your gym location is to empty the space. Get rid of it all – the lawnmower, half empty bags of fertilizer, used car parts. You want to start from an empty tableau in order to build your training sanctuary.
You can now consider your flooring. Padded flooring is important for two key reasons:
- It prevents your floor boards from impact damage when you drop weights
- It provides essential cushioning for your joints when you are doing plyometric exercises and when you’re jumping rope.
But that doesn’t mean that flooring for your gym needs to be expensive. In fact, the best floor covering we’ve come across is the 14 square inch foam tile jigsaw pieces that you can pick up at any hardware store. They are a half inch thick, providing you with plenty of padding and come in a range of colors. You can pick them up for about $20 for a pack of four of two foot square tiles. That works out to $1.25 per square foot.
Best Gym Flooring Sources:
Step 2: Defining Your Priorities
Once you’ve covered your workout area with half inch padded flooring, you’re ready to plan your space for the customized fitting out that will allow you to reach your fitness goals.
Think about your training preferences. Are you a heavy weight guy, who begrudgingly throws in a couple of cardio sessions per week? Or do you spend most of your time doing aerobic workouts designed to torch body fat? Is yoga your main interest – or is it pilates?
The answers to these questions will determine what percentage of space you dedicate to the resistance training and the cardio areas of your gym. Most people will spend about 70% of their workout time using resistance equipment and 30% on the cardio gear.
You should portion out your training space in accordance with your training time. So, if you fit the norm mentioned above, 70% of your area should be for resistance equipment and 30% for cardio equipment.
Step 3: Maximizing Space
Now that you’ve identified the area breakdowns of your gym, you should sit down with pencil, ruler and paper and start planning where things will go.
Draw a scale image of the room. Next allocate the space between aerobic and anaerobic areas with a line. Lightly shade the aerobic area.
Now, we can start thinking about the essential gear you’ll want in each area:
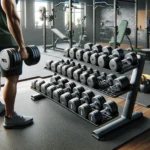
Weight Training Area
- Power Rack
- Bench
- Barbells
- Dumbbells
- Dumbbell rack
- Weight plates
- Pull Up Bar
- Dip Bar
Cardio Training Area
- Exercise bike
- Jump rope
- Plyo boxes
- Agility Ladder
Extras (If you can afford it)
- Treadmill
- Rowing Machine
- Elliptical Machine
Starting with your weight training list, you can now start positioning the gear on your workout area plan. Here are some things to keep in mind:
- Place the power rack first – this will be the hub of your weight area.
- Allow for 18 inches clearance on either side of the power rack for the barbell to move freely.
- Position a single tier dumbbell rack against a wall alongside the power rack.
- Ideally, your pull up bar and dip station will be part of the power rack.
- Position a 3 tier barbell rack against the wall.
- Draw a three-foot square on your plan where you will be performing your standing barbell work – it should directly face a wall
For your aerobic area, place the exercise bike and then draw squares to represent the allocated spaces for your plyo boxes, agility ladder and jump rope, ensuring that you give yourself plenty of room to move.
Step 4: Mirrors & Wall Coverings
Those head to toe mirrors you see in gyms aren’t about ego – they are an essential way for you to check on your training form.
You’ll need a couple of full length mirrors in your home gym for the same purpose. Your mirrors should be positioned in the areas where you will be performing your free weight exercises.
You can pick up a couple of kitchen mirror sheets from your local hardware store for about $45 per 3 foot x 2 foot sheet. This is much cheaper than buying an actual gym mirror.
Check out this home handyman video on how to install your gym mirror . . .
When it comes to wall coverings, a light neutral paint job will allow you to put up posters or other items that create atmosphere and provide you with the inspiration to train at maximum effort.
Check out the cool range of inspirational posters here.
Step 5: The Power Rack
A power rack will be your bulkiest and most costly piece of home gym equipment. Despite the cost in terms of money and space, however, you DO NOT want to bypass this vital piece of weight training gear.
A good power rack will have a foot print of about 4 feet by 4 feet. Many of them have provision for attachments that extend the foot print further. You’ll also need at least 8 feet of headroom (add a foot if it’s got a pull up bar).
A power rack provides safety bars that you can drop the weight onto if you get stuck. This is a huge advantage when training at home on your own. You’ll want to perform all of your brute strength exercises (squats, bench press, deadlifts, push press) inside your power rack.
Here’s what to look for when selecting your power rack . . .
- The rack framing should be very sturdy, make from heavy gauge square steel and the minimum amount of plastic.
- You want a minimum load capacity of 1000 pound (455 kg).
- The safety pin should be adjustable all the way to the floor.
- The hole spacing on the safety pin uprights should be one inch apart – two inches is too wide!
- You want numbered holes on the uprights.
- It should feature a pull up bar, ideally with multi grip options.
- A dip bar should be included, with bars that taper out slightly.
- Check your local classified advertising for a used power rack
Best Power Rack:
Budget – PowerLine PPR200X Power Rack
Mid Range – Titan T-3 Series HD Power Rack Squat Deadlift Lift Cage Bench
Premium – Valor Fitness BD-7 Power Rack with Lat Pull Attachment
Power Rack Alternatives
The Squat Rack
While a power rack will provide you with an effective squatting spotter mechanism, it is an expensive and a bulky unit. If you either can’t afford or don’t have the room for a power rack, you will need to invest in a solid squat rack to enable you to rep out on your squats safely.
The foot print of a squat rack is usually 3 by 5 feet. The uprights will also be adjustable to allow for bench pressing and performing shoulder presses. Make sure that the holes are spaced no more than an inch apart and that the bar rests are sizeable and sturdy.
Best Squat Rack:
Budget – Valor Fitness BD-8
Mid Range – TDS Squat Cage
Premium – T2 Titan Squat Cage
The Smith Machine
The Smith Machine is as bulky and expensive as a power rack. It’s benefit is that it provides you with a secure glide track that allow you to lock the bar in at any position along its movement path. This allows you to bail out of the exercise at any point.
A downside of the Smith Machine is that if forces you into an unnatural straight up and notion movement path. Over time, this may actually weaken your free weight lifting power.
Best Smith Machine:
Budget – Valor Athletics Smith Machine
Mid Range – Powerline PSM144X Smith Machine
Premium – Marcy Diamond Elite Smith Cage
Step 6: Free Weights
Barbells
You’ll need at least one barbell for your home gym. You’ll have to decide whether to go with a standard or an Olympic barbell. A standard bar holds weight plates with a 11/16-inch hole in the middle. On Olympic plates, the hole is 2 inches across. So, the plates for one bar will not fit on the other.
A standard barbell is about half the price of an Olympic bar. It is 7 foot long, weighs 20 pounds and can handle up to 400 pounds of load.
In contrast, a 7-foot Olympic bar weighs 44 pounds and can hold up to 1000 pounds of weight. Your best investment is to shop around for an Olympic barbell set. Sets that includes the bar, 255 pounds of weight and collars, have been known to retail for as little as $99.00.
The best type of fasteners for the end of your barbell are spring collars which are among the cheapest, quickest and easiest to get on and off.
Best Bars:
Budget – Gold’s Gym 100 lb cement barbell set
Mid Range – VTX 300 lb Olympic grip barbell set
Premium – USA Sports 300 lb Olympic Weight Set
Dumbbells
When it comes to buying dumbbells, you have quite a few options, ranging from adjustable handles which you load yourself to fixed hexagonal and selectorized sets.
While adjustable dumbbells may offer the cheapest alternative, they are also a pain to adjust. Often, too, the collars tend to slip and it can be tricky fitting the required plate onto the short bar.
You’ll find fixed dumbbells to be much easier to handle. The problem is that they are expensive – especially when you’re constantly having to buy new ones to keep up with increasing strength levels. A smarter option I to invest in a set of selectorized dumbbells.
Selectorized dumbbells are nested hand weights that come in blocks that hold think stacks of 5 pound plates. You choose the weight you require by adjusting a selector pin. This one block, therefore, is able to replace a whole rack full of dumbbells, saving you both money and storage space.
Best Dumbbells:
Budget (Adjustable) – CAP Barbell Adjustable Dumbbells
Mid Range (Selectorized) – PowerBlock Elite Dumbbells
Premium (Hexagonal) – CAP Barbell Rubber Coated Hex Dumbbells
Step 7: The Bench
A solid bench is essential to safe, productive workouts. To tell whether a bench is solid, press your thumb into the middle of the pad. If you can touch the wooden base of the bench, the pad is too soft.
Because you have already invested in a power rack, you don’t have to buy a bench with built in uprights. Simply position your bench in the rack and position the safety pins where you need them.
You want to invest in a bench that provides you with secure incline options and that provides you with a very secure base to work from. It should have at least six incline settings, including fully upright. It should also have wheels for easy wheeling around as you’ll be moving it in and out of your power rack frequently.
Best Benches:
Budget – Marcy Flat Utility Weight Bench
Mid Range – Bowflex 3.1 Adjustable Bench
Premium – Ironmaster Super Bench Adjustable weight-lifting Bench
Multipurpose Flat/Incline/Decline – Escape Fitness Deck
Step 8: Cardio Equipment
Stationary Bike
There are all manner of choices when it comes to setting up your cardio area. Starting with a solid exercise bike will allow you to get in an effective high intensity interval cardio workout whenever you wish, while also warming up your lower body for your weights workout.
Here’s what you need to consider when shopping for a stationary bike . . .
- Power Source – your options are using your legs against air resistance, a flywheel (you’ll want it to be at least 20 pounds), or magnetic frictionless resistance. The last option gives the smoothest ride.
- Custom Fit – you will want a bike that allows you to adjust the seat, and handle bars to give you get a comfortable seating position.
- Electronics – As a minimum, you’ll want the console to provide you with an odometer, a speedometer and a timer. Of course, you can pay for lots of workouts apps and resistance levels. However, you will burn just as many calories with a basic console.
Best Stationary Bikes:
Budget – Exerpeutic Folding Magnetic Upright Bike With Pulse
Mid Range – Sunny Health & Fitness Pro Indoor Cycling Bike
Premium – Schwinn 270 Recumbent Bike
Jump Rope
A jump rope will probably be the cheapest piece of equipment in your entire gym. Yet, there is nothing that will burn calories faster.
In selecting your jump rope, get the right length by standing on the middle of the rope and pulling up to your armpits. If it reaches to your armpits, it is the right length. You’ll want a rope with a metal cable, 90 degree connections and ball bearing swivels.
You want the handle to be as light as possible and to be constructed of either shatter proof plastic or light aluminum.
Best Jump Ropes:
Budget – Speed Jumping Rope for Exercise, Double Unders, Cross Fitness, Boxing, MMA
Mid Range – Aluminum Fitness Jumprope with Ball Bearing Handles
Premium – ELITE SURGE Jump Rope For CrossFit Double Unders
Plyo Boxes
In addition to your stationary bike, you should get hold of a set of three plyo boxes. Box jumps are a great way to develop power, coordination and agility while also burning through a ton of calories. A set of 3 will allow you to graduate your workout intensity.
Best Plyo Boxes:
Budget – BOUND 3 in 1 Wood Plyo Box
Mid Range –Rep 3 in 1 Wood Plyometric Box
Premium – j/fit Plyometric Jump Boxes
Agility Ladder
The agility ladder is a rope ladder which you place on the floor, enabling you to do a whole range of plyo workouts. You should purchase a ladder that has adjustable slats, allowing you to vary your stride length.
Your ladder should also come with stakes for you to pin it to the ground when using it outdoors. When using it inside, you can put small weights on the ends to keep it in place.
In terms of length, you want at least 15 rungs on your ladder.
Best Agility Ladders:
Budget – Yes4All Durable Agility Ladder
Mid Range – SKLZ Original Quick Ladder
Premium – Trained Agility Ladder Bundle
Extras (If you can afford it)
Treadmill
A treadmill is a valuable addition to your home gym, but one that can come at a sizeable cost. If your budget can afford it, a treadmill will broaden your cardio option considerably.
Here’s what you need to consider when choosing the one that’ right for you . . .
- You’ll want a motorized tread with at least a 1.5 horsepower continuous duty engine.
- The max speed should be in the 16-20 miles, per hour range to allow for high intensity interval training.
- The running surface should be at least 18 inches wide and 50 inches long.
- Check for a treadmill that has preset training programs that automatically change the speed and incline to simulate running on different terrains.
- You should buy a treadmill that monitors you training heart rate. This may be by way of a handgrip sensor, a thumb sensor, or a wireless chest strap, which is the most accurate method.
Best Treadmills:
Budget – Weslo Cadence G 5.9 Treadmill
Mid Range – Sunny Health & Fitness Treadmill
Premium – LifeSpan TR1200i Folding Treadmill
Rowing Machine
A rowing machine provides a very effective cardio workout, while working the muscles of both your upper and lower bodies. You can get various resistance methods, ranging from magnets to air, and even water. The most effective is a wind resistance machine, in which a flywheel creates the resistance.
You need to look for a solid treadmill with easily adjustable foot pedal, sturdy toe straps, and a seat that smoothly glides up and down.
Best Rowing Machines:
Budget – Stamina Body Trac Glider 1050 Rowing Machine
Mid Range – Stamina Air Rower (Black, Chrome)
Premium – Concept2 Model D
Elliptical Machine
An elliptical machine will allow you to get both an upper and lower body workout in as you also challenge your cardio system and burn a tone of calories.
Here’s what to look out for . . .
- A flywheel will give you a more natural, smooth resistance than a magnetic resistance cross trainer.
- You’ll want forward / backward motion.
- Arms should move back and forth.
- You don’t want the handlebars coming too close to you body.
- Pedals should be non-slip.
- Look for a cross trainer with pre-programmed training apps, and that gives you a readout of your vital training data
Best Elliptical Machines:
Budget – Stamina In-Motion Elliptical Trainer
Mid Range – Schwinn 430 Elliptical Machine
Premium – Sole Fitness E35 Elliptical Machine
Step 9: Compound Machines
A compound, multi-station exercise machine is easier to use, safer and, in the long run, more cost effective than free weights. While hardcore iron pumpers may not need to invest in a multi station, it is a smart choice for beginning and intermediate trainers.
A good multi-station machine will provide you with a chest press, shoulder press, lat pull-down, leg extension, and leg press, along with high and low cables to allow for a range of pulley exercises.
The majority of compound machines are designed to fit snugly into a corner or against a wall. The average footprint is about 5.5 feet long, 4 feet wide, by 7 feet high. Keep in mind, however, that you’ll need a couple of feet clearance to get in and out of the various stations.
Most multi-gyms will allow you to purchase extra stations as you budget allows. The majority of machines also come with a 200- 300 pound weight stack. Look for 10-pound weight divisions to give yourself plenty of resistance options.
Best Compound Machines:
Budget – Bowflex PR1000 Home Gym
Mid Range – Marcy Diamond Elite Smith Cage with Linear Bearings
Wrap-Up!
You now have a roadmap to setting up your ultimate home gym.
By working through this article systematically, you’ll be able to take an empty room and transform it into your own personal sweat factory.
While it will take time to equip your gym with everything you need, getting started is the key. Begin by preparing the room and, then, add your essential equipment as you can afford it. Before long, you’ll have created a training haven to cherish.